AI coding agents can help developers write code faster, explore large codebases, fix errors, and complete development tasks. However, giving an AI agent access to a project does not automatically make it reliable.
The agent still needs to understand the project, follow its rules, use the right tools, and verify its work.
This is where harness engineering becomes useful.
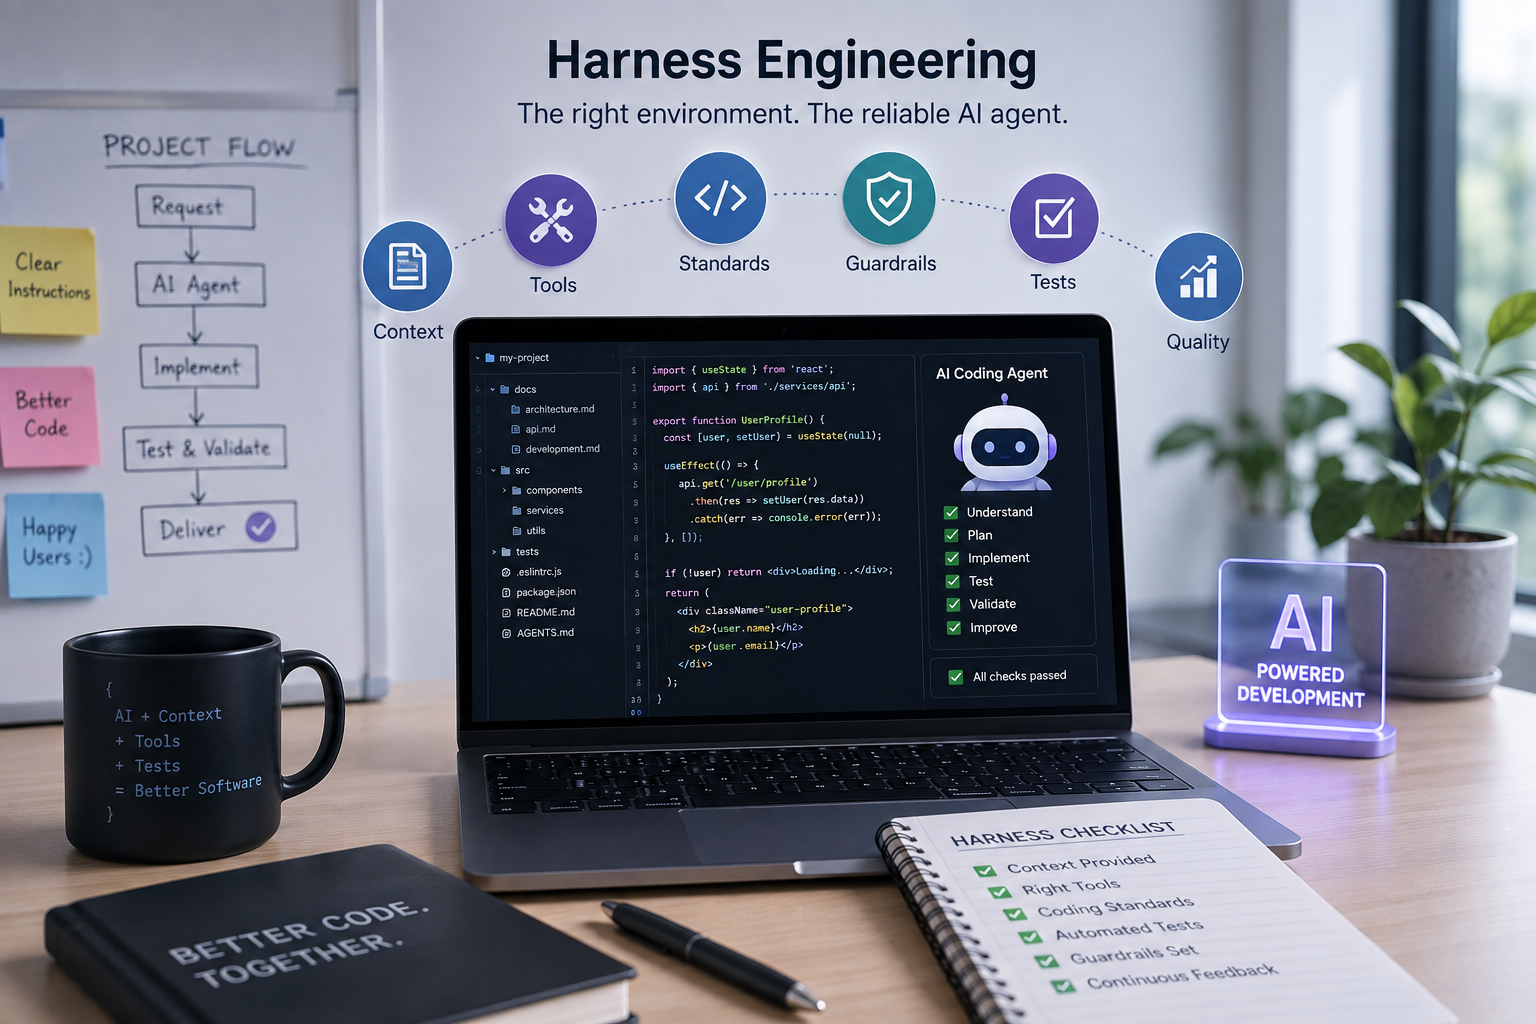
Harness engineering focuses on building the environment around an AI coding agent. The environment gives the agent clear instructions, useful context, development tools, automated checks, and safe boundaries.
In this guide, we will explain how to implement harness engineering in an existing software project. We will also look at the files, tools, rules, tests, and workflows that can make an AI coding agent more reliable.
What Does Harness Engineering Mean in Practice?
Harness engineering is not a single tool or framework.
Instead, it is a development approach that connects several parts of a project.
A practical harness can include:
- Project instructions
- Architecture documentation
- Coding standards
- Development commands
- Linting
- Type checking
- Automated tests
- Validation scripts
- Agent permissions
- Error feedback
- Human approval for sensitive actions
The goal is simple.
The AI agent should have enough information to understand the project and enough feedback to verify its work.
For example, instead of asking an agent:
“Add a user profile feature.”
you can provide project rules, explain the existing architecture, point the agent to similar features, and require tests before the task is considered complete.
As a result, the agent has a much clearer path from the request to the final implementation.
Step 1: Create a Project Instruction File
The first step is to create a central instruction file for your AI coding agents.
Depending on the AI development tool you use, the exact filename can be different. For example, some teams use an AGENTS.md file or another project-specific instruction document.
The important part is not the filename.
The important part is that the instructions are easy for the agent to find and understand.
Your instruction file should explain:
- Project structure
- Technology stack
- Coding conventions
- Important commands
- Testing rules
- Build process
- Database rules
- API conventions
- Authentication rules
- Files that should not be changed
- Security requirements
For example:
Project structure:
apps/
web/
api/
packages/
ui/
config/
docs/
The instructions can also explain how developers should work inside each directory.
This gives the AI agent a reliable starting point.
Step 2: Document the Architecture
Next, document how your application works.
An AI agent can read source code, but that does not mean it will immediately understand the business logic behind the code.
Therefore, architecture documentation is important.
Create a documentation directory such as:
docs/
You can then create files such as:
docs/architecture.md
docs/api.md
docs/database.md
docs/development.md
The architecture document can explain:
- Frontend structure
- Backend structure
- Database structure
- External services
- Authentication
- Important workflows
- Data flow between services
For example, if your application uses React on the frontend and Python on the backend, the documentation can explain how requests move from the React application to the API and then to the database.
This reduces the amount of guesswork required from the agent.
Step 3: Define Coding Rules
AI agents often generate technically valid code that does not match the existing project style.
For example, an agent may create a new API pattern even though your project already has a standard pattern.
To avoid this problem, define clear coding rules.
Your project instructions can include rules such as:
- Reuse existing components before creating new ones.
- Follow the existing API structure.
- Do not duplicate business logic.
- Do not modify unrelated files.
- Add tests for important changes.
- Do not remove existing validation without a reason.
- Follow the existing naming conventions.
- Keep changes focused on the requested task.
These rules are simple, but they can significantly improve consistency.
Step 4: Add Standard Development Commands
A good harness should make important development commands easy to run.
For example, a JavaScript or TypeScript project may have:
npm run lint
npm run typecheck
npm test
npm run build
A Python project may use:
ruff check .
mypy .
pytest
These commands allow the AI agent to validate its changes.
For example, after changing a Python API, the agent can run:
pytest
If a test fails, the agent receives feedback.
It can then investigate the problem, update the code, and run the tests again.
Therefore, commands are not just developer utilities. They become part of the AI agent’s feedback loop.
Step 5: Add Linting
Linting should be part of the normal development workflow.
A linter checks source code for common issues, style problems, and patterns that may cause bugs.
For example, a TypeScript project might use ESLint.
A Python project can use Ruff.
The exact tool does not matter as much as having a repeatable check.
For example:
npm run lint
or:
ruff check .
The important rule is that the AI agent should run the linter after making relevant changes.
This gives the agent immediate feedback.
Step 6: Add Type Checking
Type checking is another useful safety layer.
For TypeScript projects, you can use:
npm run typecheck
For Python projects, you can use:
mypy .
Type checking can catch problems such as incorrect function arguments, missing values, and incompatible data types.
For example, an AI agent may change a function so that it expects a number instead of a string.
The application may still look correct in some cases. However, a type checker can identify the mismatch before the code reaches production.
As a result, type checking helps the agent catch mistakes earlier.
Step 7: Add Automated Tests
Testing is one of the most important parts of harness engineering.
Your project should have tests that verify important behaviour.
Depending on the application, you may use:
- Unit tests
- Integration tests
- API tests
- End-to-end tests
- Regression tests
For example, if an AI agent changes the authentication flow, the existing authentication tests should run before the task is considered complete.
A simple workflow could be:
- Read the task.
- Understand the existing implementation.
- Make the change.
- Run tests.
- Fix failures.
- Run tests again.
- Complete the task only when the required checks pass.
This creates a validation loop around the AI agent.
Step 8: Create a Validation Command
It is useful to have one command that runs the most important project checks.
For example:
npm run check
That command could run:
- Linting
- Type checking
- Tests
- Build validation
For a Python project, you could create a similar command using your preferred tooling.
This makes the process easier for both developers and AI agents.
Instead of remembering several commands, the agent can run one standard validation command.
For example:
npm run check
If the command passes, the agent has stronger evidence that its changes are ready for review.
Step 9: Add Guardrails
AI agents should not have unlimited permissions.
This is especially important when an agent can access databases, cloud infrastructure, production systems, or sensitive files.
Define clear boundaries.
For example, an agent may be allowed to:
- Create application files
- Modify source code
- Run tests
- Run local development commands
- Update documentation
However, sensitive operations may require human approval.
These can include:
- Production deployments
- Deleting production data
- Changing security settings
- Rotating credentials
- Destructive database commands
- Changing cloud infrastructure
The exact rules depend on your project.
The goal is to give the agent enough freedom to work efficiently while protecting important systems.
Step 10: Protect Sensitive Information
Security should be part of the harness from the beginning.
AI agents should not receive unnecessary access to:
- Production credentials
- API keys
- Database passwords
- Private certificates
- User secrets
- Sensitive customer information
Use environment variables and secure secret management instead of placing secrets directly inside source files.
Also, make sure sensitive files are excluded from version control where appropriate.
For example:
.env
should normally not be committed when it contains secrets.
Good security boundaries help reduce the risk of accidental exposure.
Step 11: Improve Error Messages
AI agents depend heavily on feedback.
Therefore, error messages should be useful.
Compare these two messages:
“Request failed.”
and:
“User creation failed because email already exists. Check the unique email constraint in the users table.”
The second message provides much more information.
It tells the agent:
- What failed
- Why it failed
- Where to investigate
As a result, the agent has a better chance of fixing the problem without additional instructions.
Good logs, test failures, and validation messages all improve the harness.
Step 12: Create a Standard AI Development Workflow
Now combine the previous steps into one workflow.
A practical AI-assisted development process can look like this:
Understand
↓
Plan
↓
Implement
↓
Lint
↓
Type Check
↓
Test
↓
Fix
↓
Validate Again
↓
Human Review
First, the agent reads the project instructions and understands the task.
Next, it reviews the relevant code and creates a plan.
Then, it implements the requested change.
After that, it runs the project’s validation commands.
If something fails, the agent investigates the failure and makes a correction.
Finally, the agent runs the checks again before the developer reviews the change.
This process is much safer than asking an AI agent to generate code and immediately merge it.
Example Project Structure
A simple project can use a structure like this:
project/
│
├── apps/
│ ├── web/
│ └── api/
│
├── packages/
│
├── docs/
│ ├── architecture.md
│ ├── api.md
│ ├── database.md
│ └── development.md
│
├── tests/
│
├── AGENTS.md
├── README.md
├── package.json
└── .gitignore
The exact structure will depend on your application.
However, the idea is to keep project knowledge, rules, tests, and documentation easy to discover.
Example AGENTS.md Structure
Your instruction file can contain sections such as:
Project Overview
Explain what the application does.
Tech Stack
List the frontend, backend, database, and important services.
Project Structure
Explain where important files and modules are located.
Development Commands
List commands for development, linting, type checking, testing, and building.
Coding Rules
Explain the project’s coding conventions.
Testing Rules
Explain which tests should be added or executed.
Security Rules
Explain how secrets, credentials, and sensitive operations should be handled.
Change Rules
Tell the agent to avoid unrelated changes and reuse existing patterns.
This gives the agent a clear reference before it starts working.
How Harness Engineering Works With Existing Projects
You do not need to rebuild an existing application to introduce harness engineering.
In fact, it is better to improve the current project gradually.
Start by documenting the project.
Next, create clear development commands.
Then, add linting and type checking.
After that, improve automated tests.
Finally, add stronger guardrails and validation rules.
This approach allows you to improve the development process without making unnecessary changes to the application itself.
For example, if your project already has tests, keep them.
If it already has a linting setup, use it.
If the project already has documentation, improve it instead of creating duplicate documentation.
The goal is to build a useful development environment around the existing project.
Common Mistakes to Avoid
Giving the Agent Too Much Freedom
An AI agent should not automatically have access to every system.
Start with limited permissions and increase them only when necessary.
Creating Too Many Rules
Too many instructions can make the project difficult to understand.
Keep rules clear, practical, and focused on important behaviour.
Skipping Tests
Generated code can look correct and still contain bugs.
Always validate important changes.
Ignoring Documentation
If the project documentation is outdated, the agent may make decisions based on incorrect information.
Keep important documentation current.
Allowing Unrelated Changes
An agent may sometimes modify files that are not directly related to the task.
Ask the agent to keep changes focused.
This makes reviews easier and reduces the chance of accidental regressions.
Treating the AI Agent as the Final Reviewer
AI agents can help review code, but important production changes should still have appropriate human oversight.
The agent should support the development team, not remove necessary engineering controls.
Harness Engineering and Prompt Engineering
Harness engineering and prompt engineering work together.
Prompt engineering focuses on how you communicate a specific task to an AI model.
For example:
“Add a password reset API using the existing authentication pattern and write tests.”
Harness engineering provides the environment around that request.
It tells the agent:
- Where the authentication code is located
- Which architecture to follow
- Which tools to use
- Which tests to run
- Which files should not be changed
- Which security rules apply
Therefore, a good prompt becomes much more effective when it is supported by a good harness.
Measuring the Quality of Your Harness
A harness should improve over time.
One useful approach is to track recurring problems.
For example, ask:
- Does the agent repeatedly modify the wrong files?
- Does it often forget tests?
- Does it make the same type of coding mistake?
- Does it misunderstand a business rule?
- Does it frequently fail the same validation?
- Does it need the same instruction in every prompt?
If the answer is yes, improve the harness.
For example, if the agent repeatedly forgets to add tests, add a clear testing rule.
If it misunderstands the database structure, improve the database documentation.
If it makes the same validation mistake, add an automated test.
In this way, every repeated failure can become an opportunity to improve the development environment.
Final Checklist
Before allowing an AI coding agent to work independently on an important project, check the following:
✓ Project instructions exist.
✓ Architecture is documented.
✓ Coding rules are clear.
✓ Development commands are documented.
✓ Linting is available.
✓ Type checking is available where appropriate.
✓ Automated tests exist.
✓ A validation command is available.
✓ Sensitive information is protected.
✓ Agent permissions are limited.
✓ Important actions have appropriate approval.
✓ Error messages provide useful feedback.
✓ The agent is expected to validate its work.
✓ Human review is used for important changes.
Conclusion
Implementing harness engineering does not require a completely new development system.
Instead, you can start with the project you already have.
Create clear instructions. Document the architecture. Add reliable development commands. Use linting, type checking, and automated tests. Then add guardrails and a strong validation loop.
Most importantly, make the AI agent work inside a controlled environment.
The agent should understand the task, follow project rules, make the change, check the result, and fix problems when necessary.
As AI coding agents become more capable, the quality of the environment around them becomes increasingly important.
A strong harness allows your team to get more value from AI while keeping software quality, security, and engineering standards under control.
Further Reading
For more information about harness engineering and agent-first software development, read OpenAI’s engineering discussion of harness engineering.